
Go Back Term2

🧐: G stand for what? Gangstar?
😇: NO! G stand for GEEK
🤓 Welcome to the Geek Team:
Qianyin Du/ Ana Lozano/ Jorge Muñoz/ Dhrishya Ramadass/ Emmanuelle Pangilinan


We define connectivity as shared spaces, whether physical or within cyberspace. Therefore, we decided to measure these common spaces by finding the different WiFi points in the Poblenou neighborhood. To detect the different WiFis in the neighborhood, we decided to use the Barduino.
How does the availability of shared spaces, both physically and digitally, impact community connectivity and collaboration?
We want to be more 🤷CONNECTE🤷D🤷.
To detect community connectivity and collaboration by assessing the accessibility and quality of shared spaces, both online and offline.
Our hypothesis is that by employing the Barduino to detect WiFi points in the Poblenou neighborhood and utilizing multiple reference points, we will uncover varying levels of connectivity within the area. We anticipate finding a diverse range of WiFi networks, including both open and password-protected networks, reflecting the diverse usage patterns and security practices of residents and businesses in the neighborhood. Additionally, we expect that certain locations will exhibit higher concentrations of active WiFi points, indicating areas of higher connectivity and potential community engagement.
Measurement of Connectivity in the Poblenou Neighborhood using (B)arduino:

MQTT is a lightweight, publish-subscribe, machine to machine network protocol for message queue/message queuing service. It is designed for connections with remote locations that have devices with resource constraints or limited network bandwidth, such as in the Internet of Things (IoT).


Using a GPS module to record the geographical coordinates of each reference point along with the number of active WiFis present.
To measure the location, we use GPS Logger to save location data to a GPX file.


We transfer the GPX data to an Excel document, and then automatically place them on the map.
At first, we chose different locations in Poblenou that we considered to be gathering spots and hubs of connectivity.
Chosen sites: Google Sheet


We used the (B)arduino to scan and measure the amount of WiFi signal in the environment, detecting how many signals are open or closed.


We used Barduino to find and count the available Wifi networks, and how many are open/have no password.
The data is sent via the smart citizen MQTT Broker.
        #include <WiFi.h>
        #include <PubSubClient.h>
        #include <Adafruit_NeoPixel.h>

        // Which pin on the Arduino is connected to the NeoPixels?
        #define PIN 38  // On Trinket or Gemma, suggest changing this to 1

        // How many NeoPixels are attached to the Arduino?
        #define NUMPIXELS 1  // Popular NeoPixel ring size

        // When setting up the NeoPixel library, we tell it how many pixels,
        // and which pin to use to send signals. Note that for older NeoPixel
        // strips you might need to change the third parameter -- see the
        // strandtest example for more information on possible values.
        Adafruit_NeoPixel pixels(NUMPIXELS, PIN, NEO_GRB + NEO_KHZ800);

        const char* ssid = "";
        const char* password = "";
        WiFiClient wifiClient;

        const char* mqttBroker = "mqtt-staging.smartcitizen.me";
        const char* mqttClientName = "futurehacker";
        const char* mqttUser = "fablabbcn102"; // MQTT User Authentification
        const char* mqttPass = ""; // MQTT Password Authentification
        const char* topic = "lab/mdef/realg";
        PubSubClient mqttClient(wifiClient);

        unsigned long values[] = {0,0,0,0};
        String direction[] = {"U","R","D","L"};

        String dir = "";

        unsigned long threshold = 40000;

        void mqttConnect() {

          while (!mqttClient.connected()) {

            Serial.print("Attempting MQTT connection...");

            if (mqttClient.connect(mqttClientName, mqttUser, mqttPass)) {

              Serial.println("connected");
              mqttClient.publish(topic, mqttClientName);


            } else {

              Serial.print("failed, rc=");
              Serial.print(mqttClient.state());
              Serial.println(" try again in 5 seconds");
              delay(5000);

            }
          }
        }

        /*void callback(char* topic, byte* payload, unsigned int length) {
          String incommingMessage = "";
          for (int i = 0; i < length; i++){
            incommingMessage += (char)payload[i];
          }
          Serial.println("Message arrived[" + String(topic) + "]" + incommingMessage);
        }*/

        void setup() {

          Serial.begin(115200);
          Serial.println("Hello");
          pixels.begin();  // INITIALIZE NeoPixel strip object (REQUIRED)

          pixels.setPixelColor(0, pixels.Color(150, 0, 0));
          pixels.show();  // Send the updated pixel colors to the hardware.

          // Connect to wifi
          WiFi.mode(WIFI_STA);
          WiFi.begin(ssid, password);

          while (WiFi.status() != WL_CONNECTED) {
            delay(500);
            Serial.print(".");
          }

          Serial.print("Connected to ");
          Serial.println(ssid);
          Serial.print("IP address: ");
          Serial.println(WiFi.localIP());

          pixels.setPixelColor(0, pixels.Color(0, 0, 150));
          pixels.show();  // Send the updated pixel colors to the hardware.

          // MQTT setup
          mqttClient.setServer(mqttBroker, 1883);
        }

        /*void loop() {
          // Check if we are still connected to the MQTT broker
          if (!mqttClient.connected()) {
            mqttConnect();
          }

          // Let PubSubClient library do his magic
          mqttClient.loop();

          // Add your publish code here --------------------
          unsigned long max = 0;
          int max_i;
          for (int i=0; i<4; i++){
            values[i] = touchRead(i+4);
            //Serial.print(values[i]);
            //Serial.print(",");
            if (values[i] > max){
              max = values[i];
              max_i = i;
            }
          }
          //Serial.println("");
          if (max > threshold && dir != direction[max_i]){
            dir = direction[max_i];
            Serial.println(dir);
            mqttClient.publish(draw_topic, dir.c_str());
          }
          else if (max <= threshold){
            dir="";
          }
        }*/

        char msg[50];
        bool msgSent = false;

        void loop() {
          if(!msgSent) {
            // Check if we are still connected to the MQTT broker
            if (!mqttClient.connected()) {
              mqttConnect();
            }

            // Let PubSubClient library do his magic
            mqttClient.loop();
            // scan for existing networks:
            Serial.println("Scanning available networks...");
            String numNetworks = listNetworks();

            numNetworks.toCharArray(msg, 50);
            Serial.print("sending to broker: ");
            Serial.println(numNetworks);

            mqttClient.publish(topic, msg);

            pixels.setPixelColor(0, pixels.Color(0, 150, 0));
            pixels.show();  // Turn light green when data is sent

            msgSent = true;
          }
        }

        String listNetworks() {
          int numFree = 0;
          // scan for nearby networks:
          Serial.println("** Scan Networks **");
          int numSsid = WiFi.scanNetworks();
          if (numSsid != -1) {
            // print the list of networks seen:
            Serial.print("number of available networks:");
            Serial.println(numSsid);

            // print the network number and name for each network found:
            for (int thisNet = 0; thisNet < numSsid; thisNet++) {
              Serial.print(thisNet);
              Serial.print(") ");
              Serial.print(WiFi.SSID(thisNet));
              Serial.print("\tSignal: ");
              Serial.print(WiFi.RSSI(thisNet));
              Serial.print(" dBm");
              Serial.print("\tEncryption: ");
              Serial.println(WiFi.encryptionType(thisNet) ? 0: "Goodpeople");
              if(WiFi.encryptionType(thisNet) == 0) {
                numFree++;
              }
            //printEncryptionType(WiFi.encryptionType(thisNet));
            }
          }
            //while (true);
            return String(numSsid) + "," + String(numFree);
          }

We used python to merge the metadata of the location of the reference points with the metadata of the active WiFi points, including information about which ones are open.
While the barduino is sensing the data, we have a running python script that is subscribed to the same smart citizen broker so that we can "catch" the data in real-time.
We then save it into a .csv file.
        import paho.mqtt.client as mqtt
        import time
        import calendar
        from datetime import datetime

        current_GMT = time.gmtime()

        mqtt_broker = "mqtt-staging.smartcitizen.me"
        mqtt_user = "fablabbcn102"
        mqtt_pass = ""
        broker_port = 1883

        def on_connect(client, userdata, flags, rc):
           print(f"Connected With Result Code: {rc}")

        def on_message(client, userdata, message):
           print(f"Message Recieved: {message.payload.decode()}")
           time_stamp = calendar.timegm(current_GMT)
           now = datetime.now() # current date and time
           date_time = now.strftime("%m/%d/%Y, %H:%M:%S")
           print("Current timestamp:", now)
           # Do something here with the message

           if(message.payload.decode() != "futurehacker"):
              # Opening a file
              file1 = open('myfile.csv', 'a')
              file2 = open('myfile.txt', 'a')
              newdata = message.payload.decode() + "," + date_time + "\n"

              # Writing a string to file
              file1.write(newdata)
              file2.write(newdata)

              # Closing file
              file1.close()
              file2.close()


        def on_log(client, obj, level, string):
            print (string)

        def read_sensor():
            sensor_reading = "Hola hola caracola"
            return sensor_reading

        client = mqtt.Client(clean_session = True)
        client.on_connect = on_connect
        client.on_message = on_message
        client.on_log = on_log
        client.username_pw_set(username = mqtt_user, password = mqtt_pass)
        client.connect(mqtt_broker, broker_port)


        # Subscribe to your topic here
        client.subscribe("lab/mdef/realg", qos=1)


        # Start looping (non-blocking)
        client.loop_start()

        while True:
            time.sleep(5)
We developed an interface to visualize the collected data on a map. We used the Google Maps tool to create a visualization of the analyzed points.
Creating a Map...
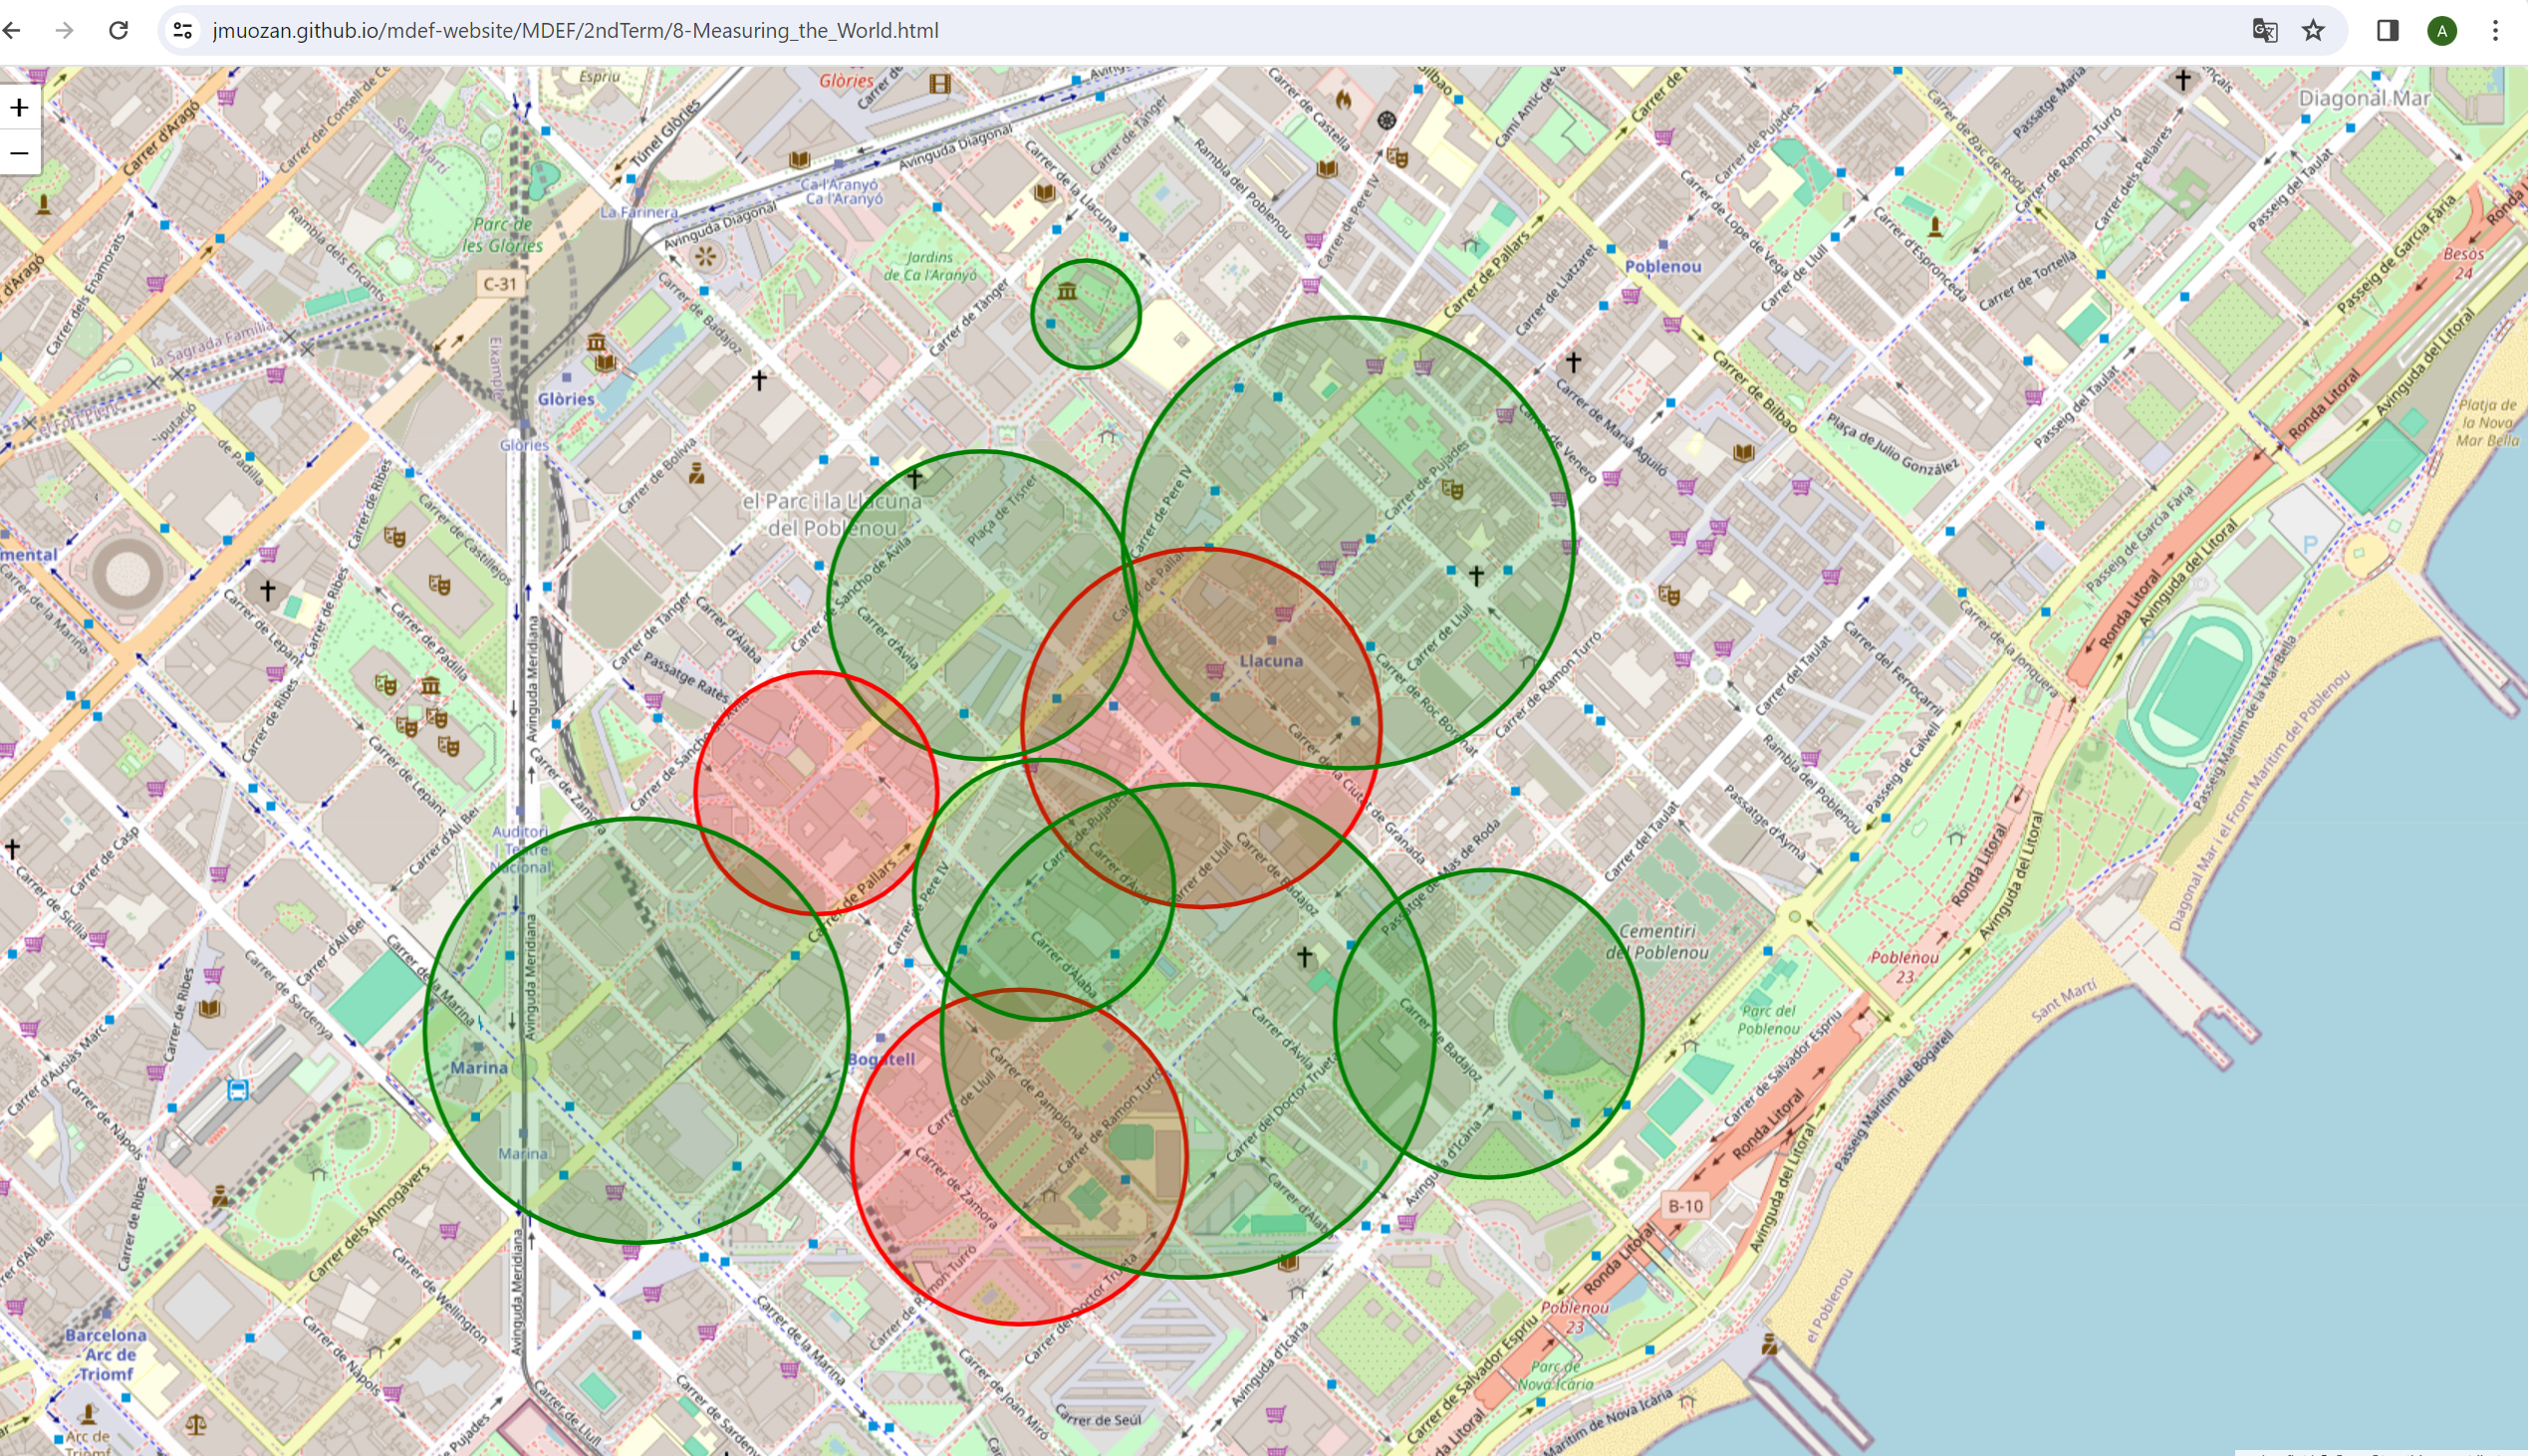
Take a look to our map!
Link to Our GoogleMapsReferences:

You can access the Google Drive folder by clicking on the following link:
Access to our presentation